
In the below instruction we will learn how to install NodeMCU ESP8266 in Arduino IDE and able to run Arduino code on NodeMCU. Whether you are working on IoT projects, home automation, or wireless sensor networks, NodeMCU serves as an excellent platform for connecting your devices to the Internet.
What is NodeMCU?
Definition
NodeMCU is an open-source IoT (Internet of Things) platform that combines both hardware and software components to create Wi-Fi-enabled microcontroller development boards. It is based on the ESP8266 Wi-Fi module, which allows easy connection of physical electronic devices—such as sensors, LEDs, and motors—to the Internet for data exchange and remote control. The name "NodeMCU" stands for Node MicroController Unit.
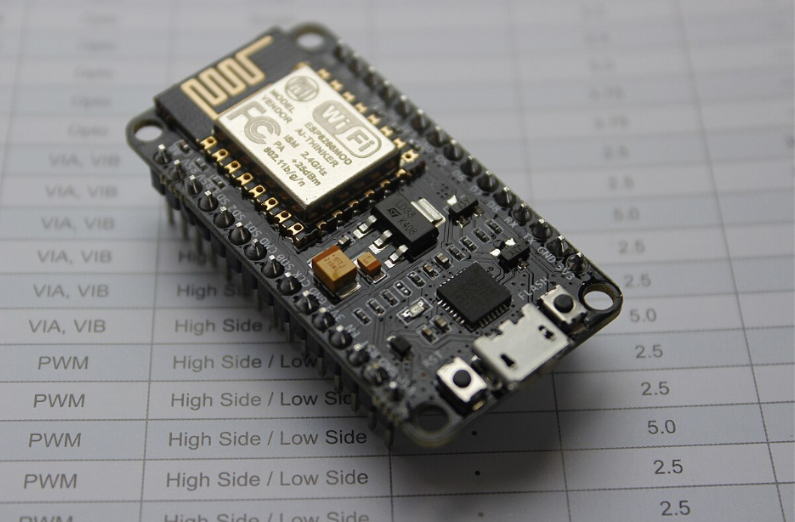
NodeMCU ESP8266 Development Board - Popular Wi-Fi enabled microcontroller for IoT projects
Prerequisites
- Arduino IDE installed on your computer
- NodeMCU ESP8266 development board
- USB cable for connecting NodeMCU to computer
NodeMCU ESP8266 Setup: Step-by-Step Instructions
Install Arduino IDE
Download from the official website and install it on your system and open the IDE:
You can also check the entire process from our previous article:
Add ESP8266 Board Package
After successfully downloading Arduino on your computer, open the Arduino IDE:
Arduino IDE Interface
Go to File → Preferences
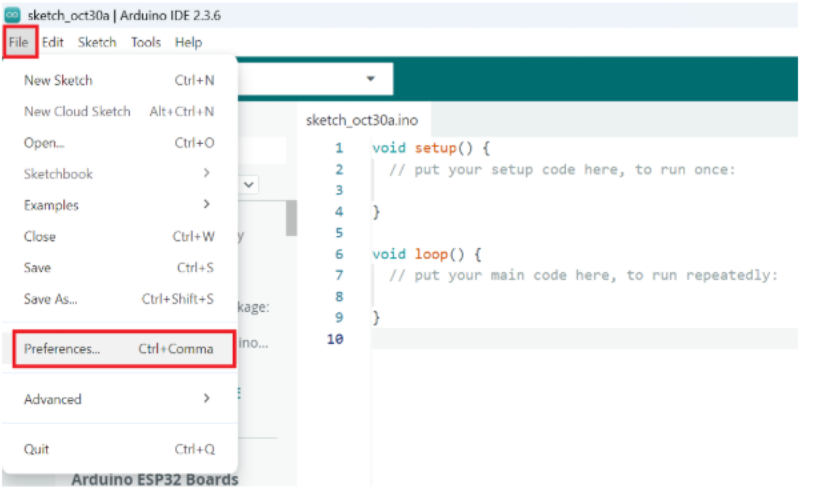
Opening Preferences in Arduino IDE
In the Additional Board Manager URLs field, paste the following link and Click on OK:
https://arduino.esp8266.com/stable/package_esp8266com_index.json
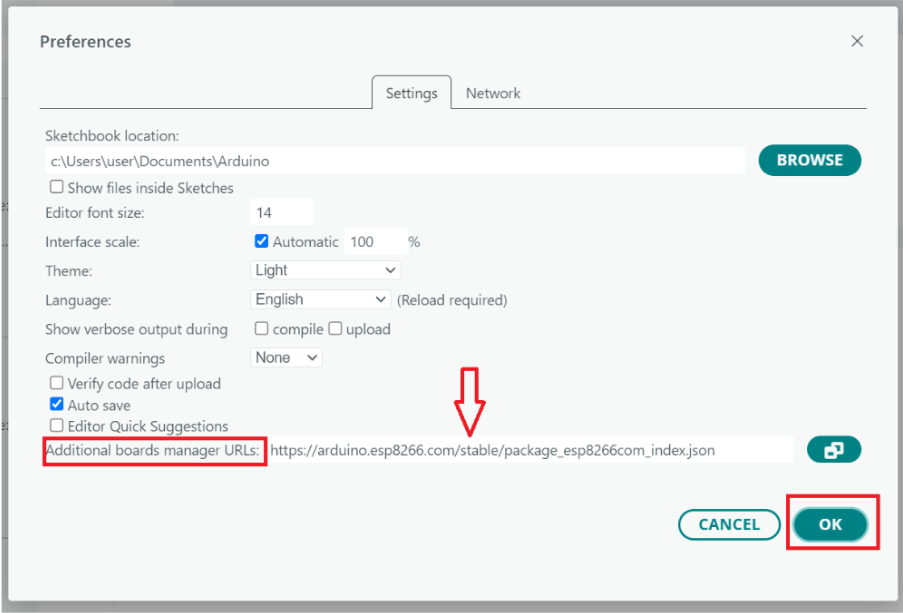
Adding ESP8266 Board Manager URL
Install ESP8266 Board Package
- Go to Tools → Board → Boards Manager
- In the search bar, type ESP8266
- Click Install for ESP8266 by ESP8266 Community
- Wait until the installation completes
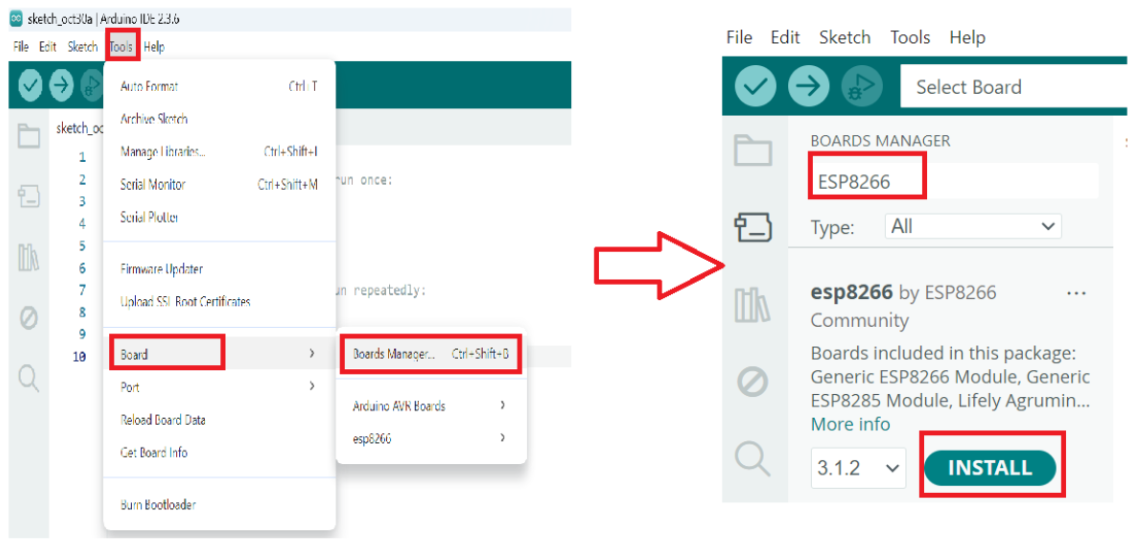
ESP8266 Board Package Installation Complete
Select NodeMCU Board
Select Tools → Board → ESP8266 Boards → NodeMCU 1.0 (ESP-12E Module)
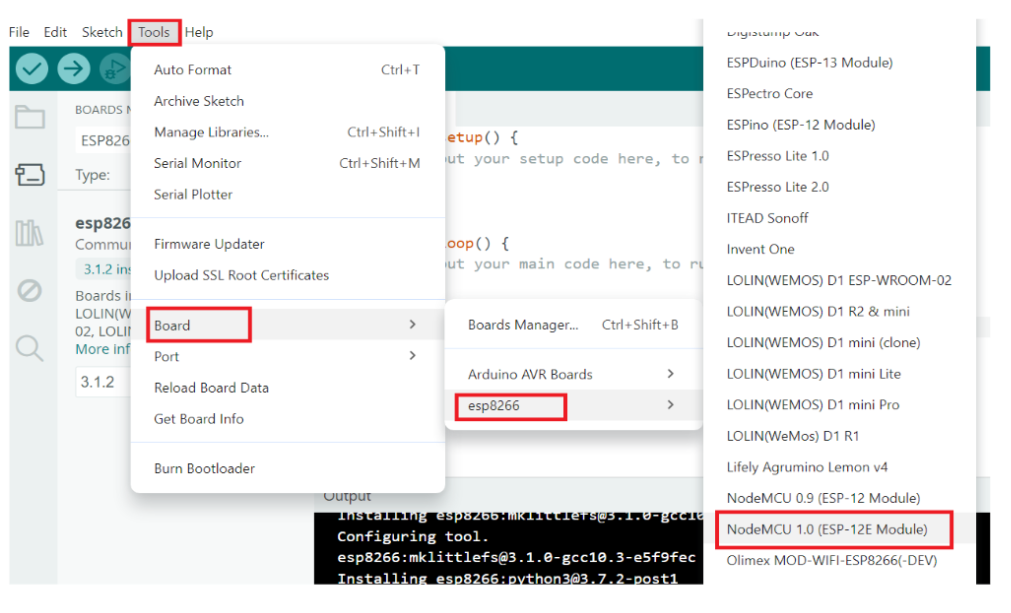
Selecting NodeMCU 1.0 (ESP-12E Module) from Board Manager
Verify Board Connection
- Connect NodeMCU to computer via USB
- Go to Tools → Port and check if the NodeMCU COM port appears
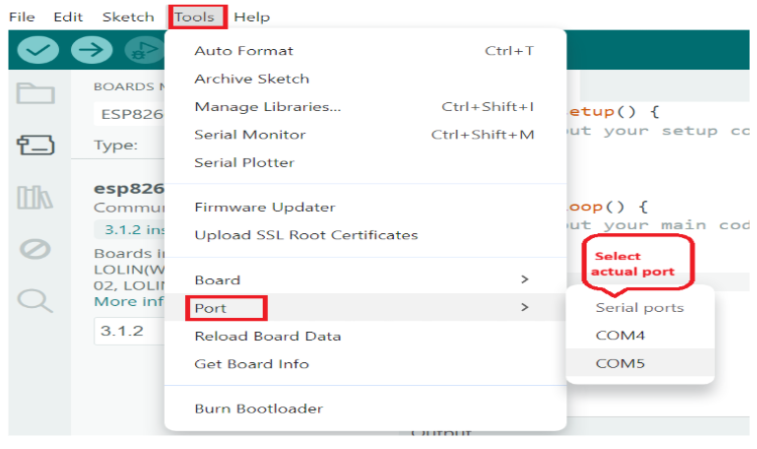
NodeMCU COM Port Detection and Selection
Upload a Sample Program
Write down this code in your Arduino IDE:
Sample Blink Code for NodeMCU
void setup() {
  pinMode(LED_BUILTIN, OUTPUT);
}

void loop() {
  digitalWrite(LED_BUILTIN, LOW);  // Turn LED ON
  delay(1000);                     // Wait for 1 second
  digitalWrite(LED_BUILTIN, HIGH); // Turn LED OFF
  delay(1000);                     // Wait for 1 second
}- Click Verify to compile the code
- Click Upload to flash it to NodeMCU
- Observe the onboard LED blinking
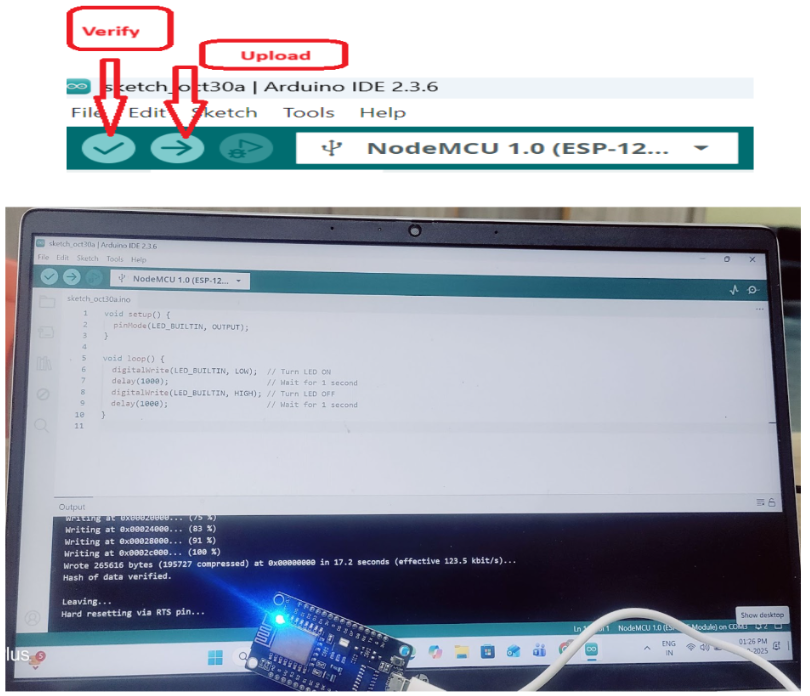
Successfully uploaded code with NodeMCU LED blinking demonstration
🎉 Congratulations!
You have successfully configured NodeMCU ESP8266 in Arduino IDE. You're now ready to start your IoT programming journey!
What's Next?
Now that you have NodeMCU ESP8266 configured in Arduino IDE, you can:
- Select NodeMCU 1.0 (ESP-12E Module) from Tools → Board
- Connect your NodeMCU board to your computer via USB
- Choose the correct COM port from Tools → Port
- Write your first Wi-Fi enabled "Blink" program
- Start building IoT projects with wireless connectivity

Mr. Ansar Ali is an experienced engineer and certified trainer specializing in IoT, NodeMCU, ESP8266, Arduino programming, SAP, and RPA technologies. He has extensive experience in wireless communication and embedded systems training.